Digital twin of masonry stone wall (Rhino) - Stones data set
For more info: andrea.settimi@epfl.ch
This tutorial has been realized by IBOIS by the collaboration with the laboratory EESD (PI: savvas.saloustros@epfl.ch) in a joint effort of digitzing a masonry wall. The goal of this tutorial series is to help users to reconstruct step by step the process of post-processing cleaning, segmentation, and reconstruction of scanned point cloud data to reconstruct a twin digital wall of a physical masonry artifact.
The tutorial is divided in 3 parts (a,b,c). The first part (a) illustrates how to digitize and build a stone data set, the second (b) shows how to reallign multiple scans into the same coordinate system and finally (c) we relocate the stone model into the wall landscape.
💬 To be able to reproduce these tutorials you will need the WIP version of Cockroach. Download Cockroach from food4rhino and replace the .rhp file with this one here. This version will be soon stable and released.
Stone scanning
This first section of the tutorial illustrates how to digitize and build a catalog of irregular geometries with Cockroach.
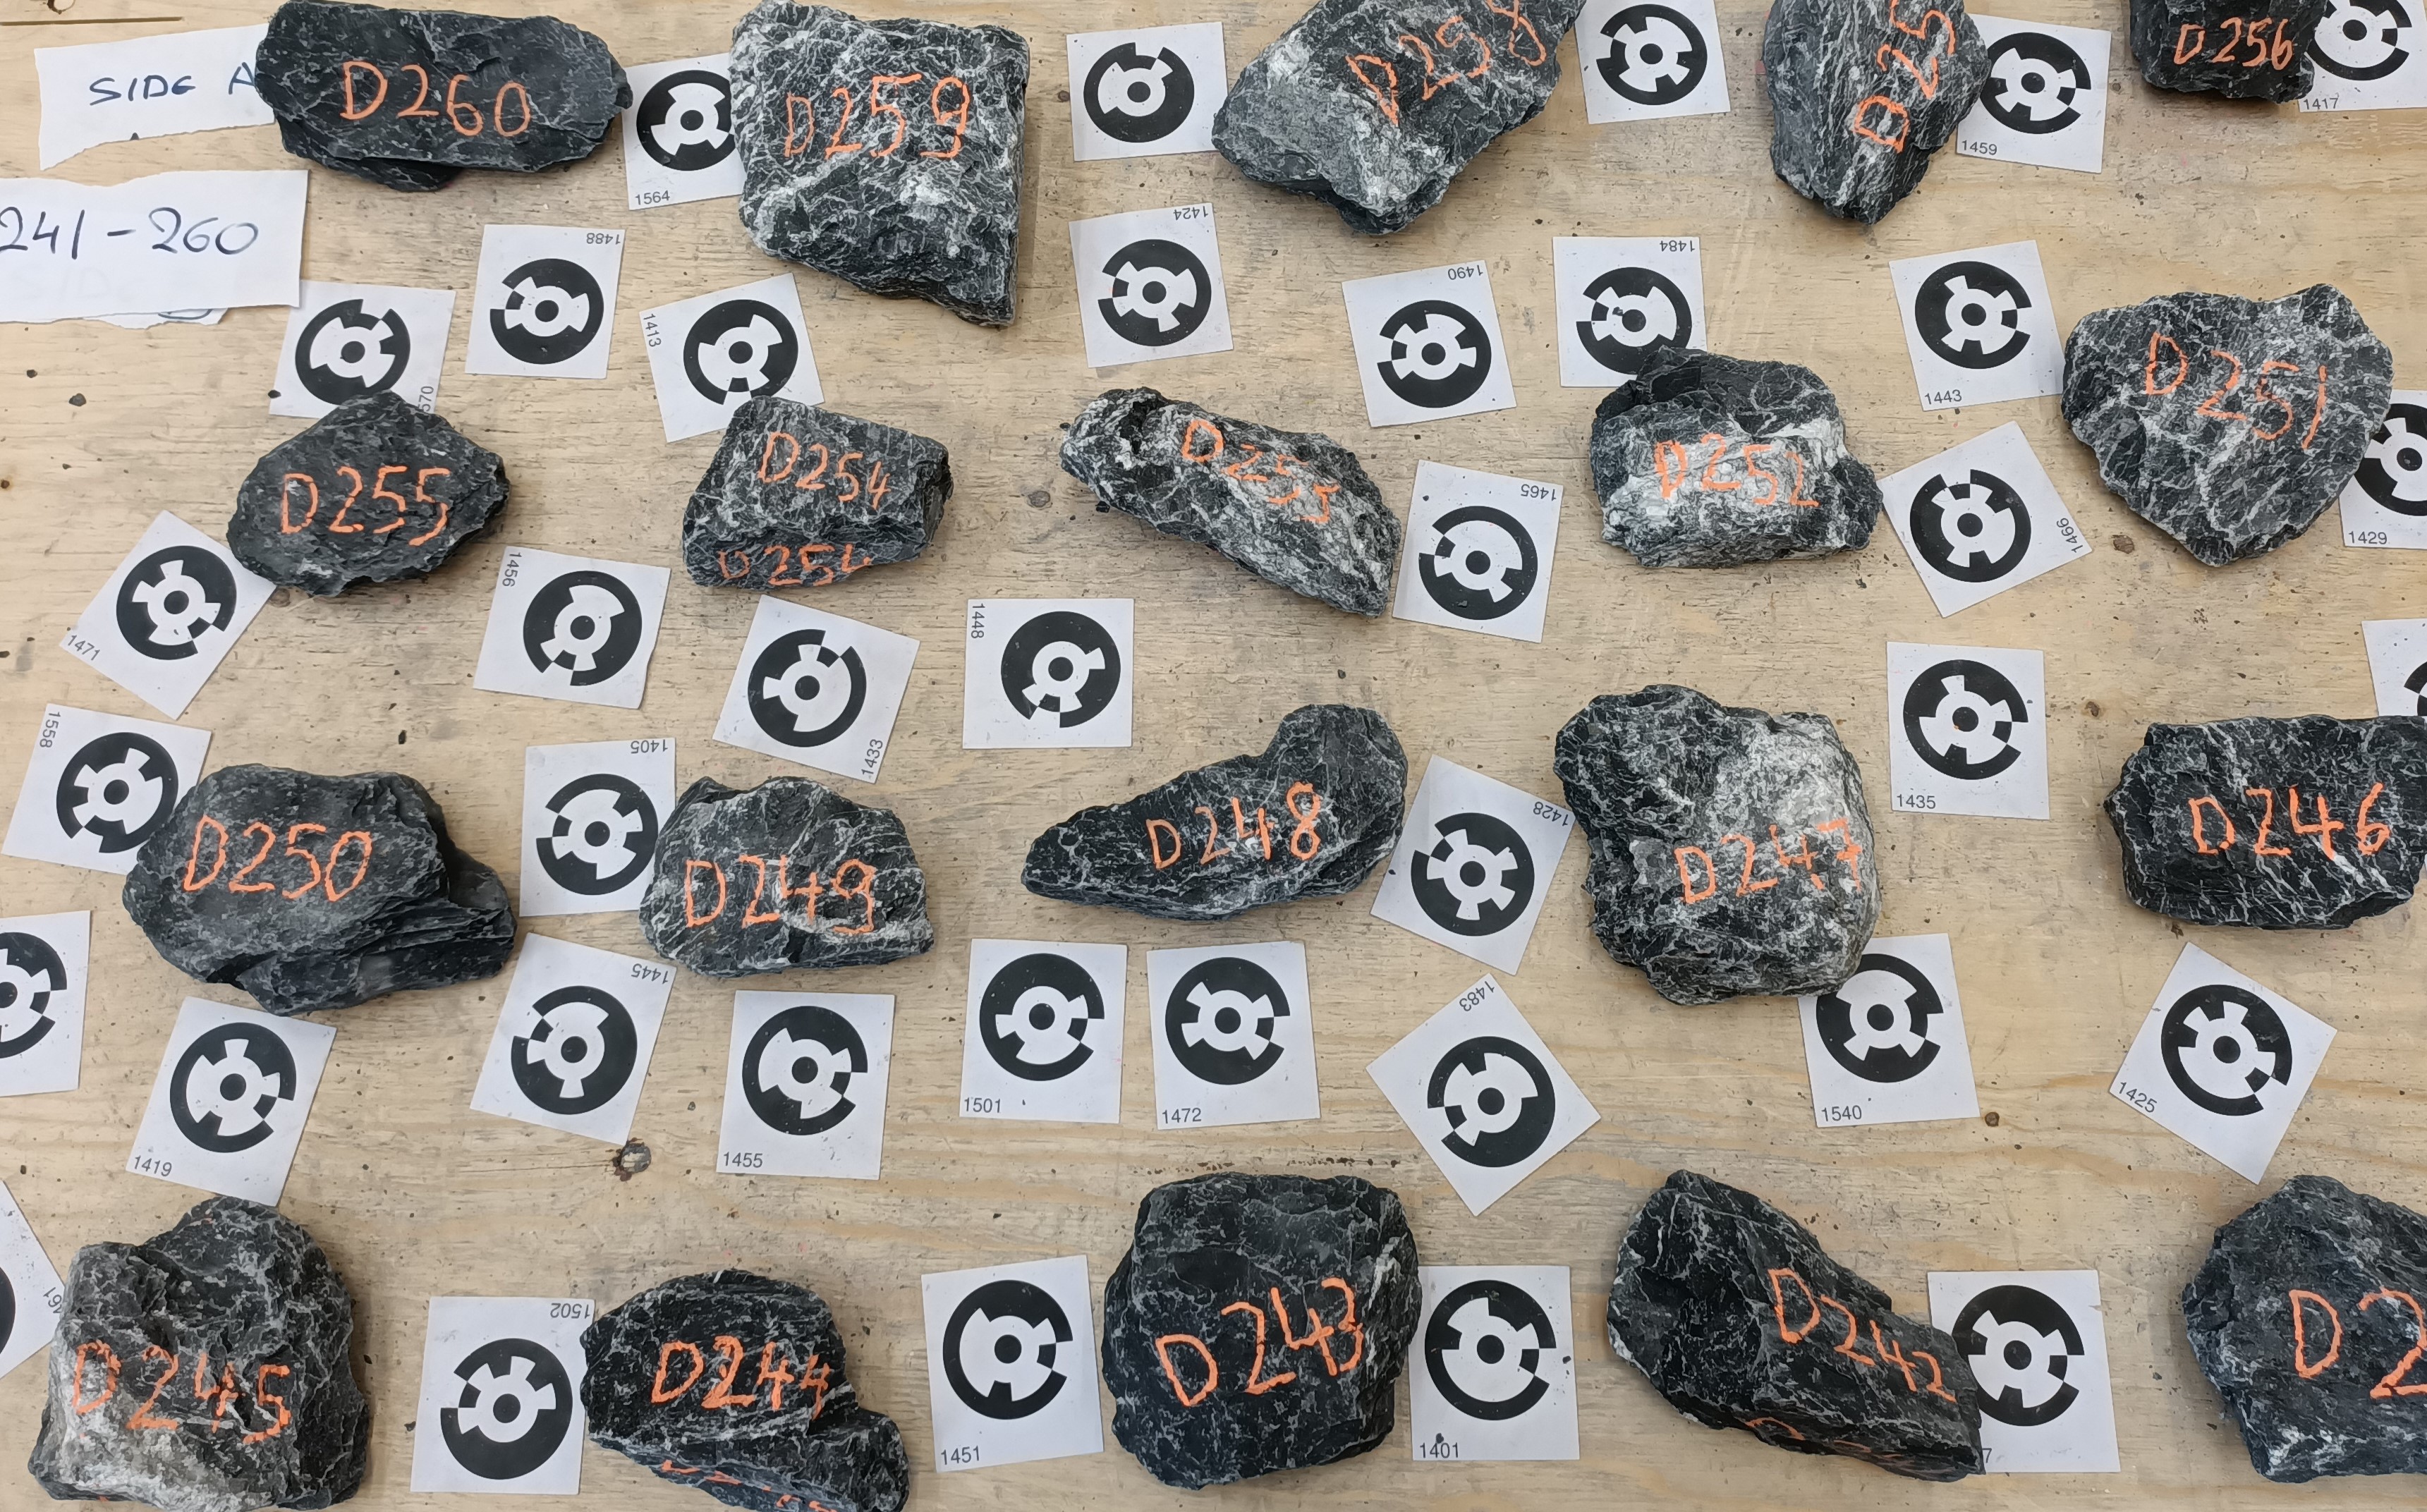
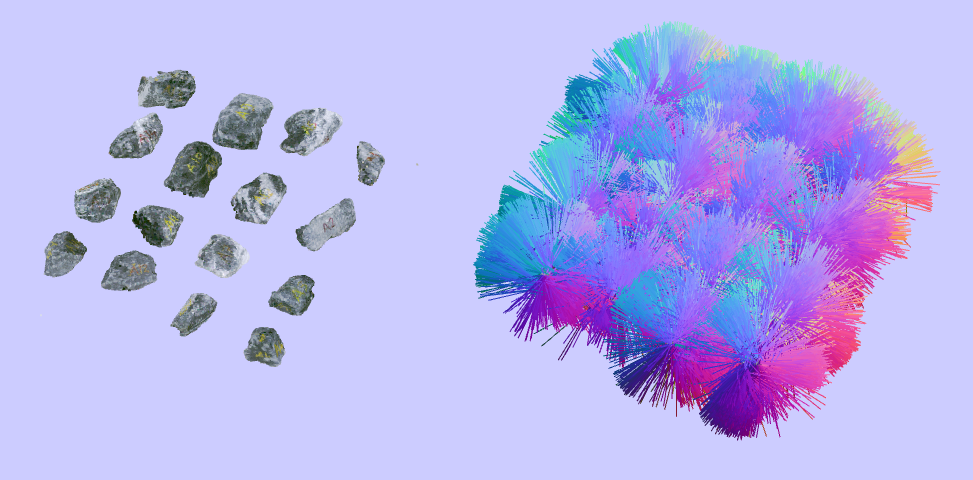
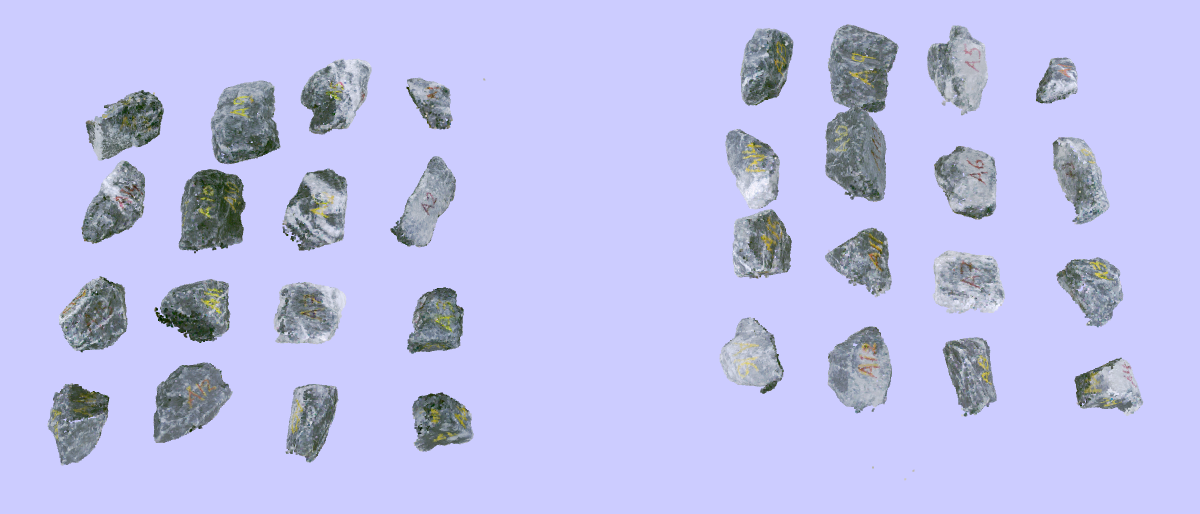
Stones need to be scanned on both sides and labeled if necessary for the reconstruction. See the image below:
Import and cleaning of point clouds
Open a Rhinoceros 7 new file and be sure that the unit system is set to meter as measurement unit. To do so type Option on the Rhino Shell and click enter, go to section unit and select meter. Now we can import the output point cloud fro mthe scanner as a format .e57. It is enough to drag and drop the file into Rhino worksapce canvas. On the option prompt select import and wait for the downloading, it might take a while. Now we have imported our “raw” point cloud. As you can see, we need first to clean the raw point cloud. Let’s tackle this point first.
The first operation is to manually remove point clouds cluster hard to automatically detect. To do so you need to hold Ctrl + Shift and drag your selection with Right mouse button. Once selected (in yellow) you can delete them with delete button. If you are cleaning a point cloud and you need a quick solution to manually clean a point cloud, this approach is your best all
Before proceding we need to downsample our point cloud. In fact, there are points in our point cloud that are really close (> 1 mm). This resolution slows down our cleaning and do not bring any good quality to our data. To reduce the cloud resolution select the cloud and next we are going to type Cockroach_VoxelDownsample into the Rhino shell, click enter . Click on the parameter VoxelSize and type 0.002 (~2mm). Now, press enter. Erase the old point cloud (the one selected) and it’s done!
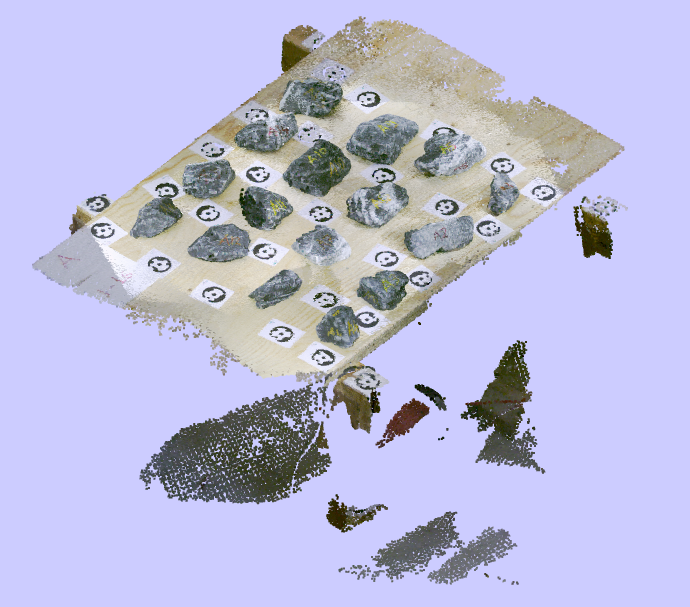
Now we need to get rid of the plane. To do so we are going to type the command Cockroach_PlaneSegmentation in the shell. Now, we need to select the point cloud to segment, click-left on our cloud. If the workspace is well in meters, the DistanceThreshold parameter should be set to 0.01 (~1cm). Once detected the plane (RANSAAC), this value represent the cutting threshold distance. Click enter, this will take a moment. Get rid of the other point clouds except the individual stones by selecting them and deleting them. If there are some clusters left from the segmentation, delete them like in the preavious step.
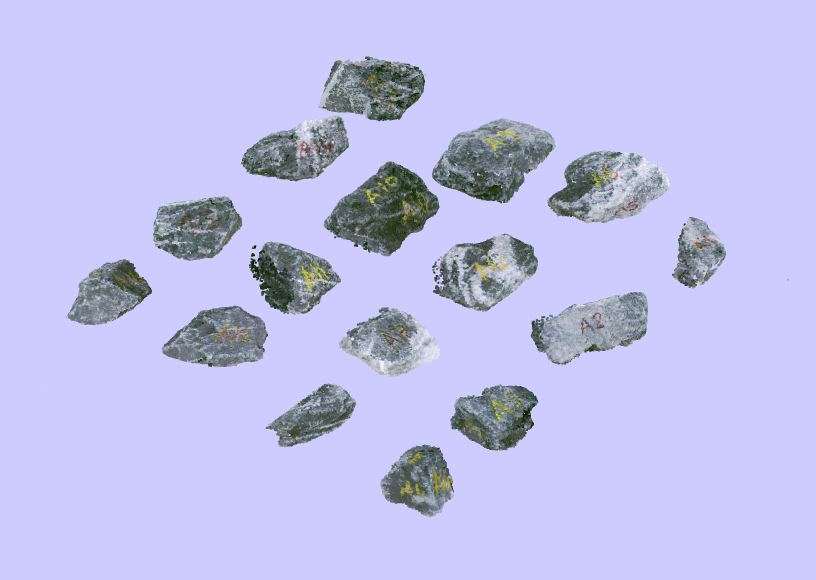
It’s time to seperate our stones and create one individual point cloud for each stone. To do so we are going to use the command Cockroach_ClusterEuclideanKSearch, type it in the shell and press enter. Select the point cloud. Once selected, the presets should be fine except one: click on ColorPointCloud. This will change the value from True to False, we don’t want our new clusters to be colored. The output cloud is in a group, to degroup, select it and type ungroup, press enter. Now each stone is a seperate cloud.
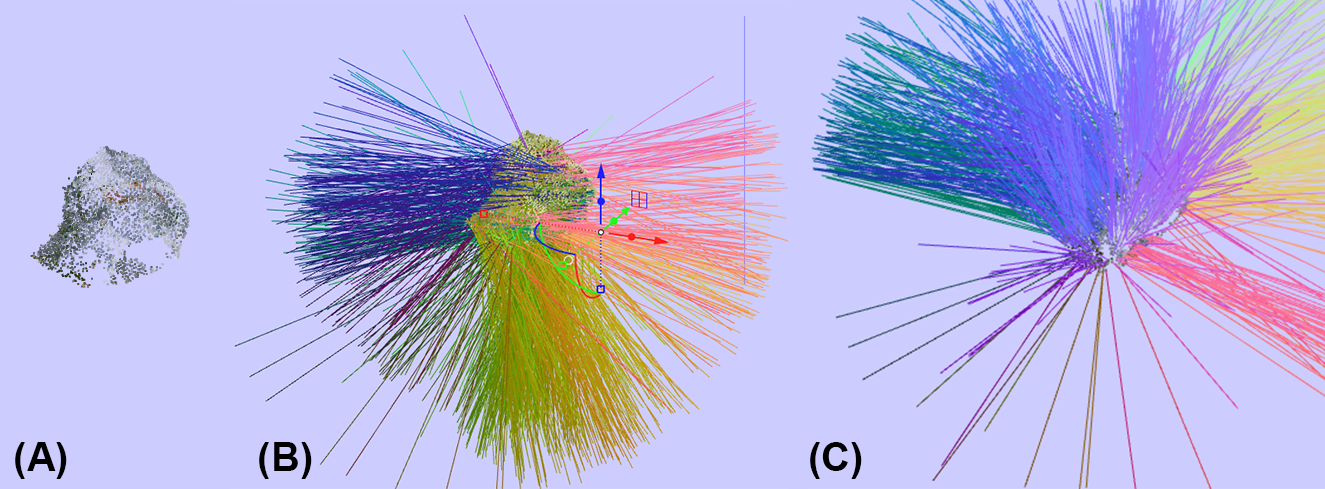
We need to do one last thing: evaluate the normals of the cloud. This is a very important information in the point cloud and we need to compute it and embed it in the point cloud. Normals are often not well oriented once the cloud is imported. The following image shows a stone point cloud with wrong normals (A). If you are in doubt about the normal “quality” use the command Cockroach_ShowNormals. This will show the normals with different colors accordingly to their directions. As you can see the normals in this case are all over around (B). We are going to use the command Cockroach_ComputePointCloudNormals, select all the clouds first. This will evaluate the point cloud normals and orient them in the right direction. NormalsNeighbours should be set to 30. In the right image (C) you can see that the normals are correctly oriented.
Our batch composed by halves of stones is done. Next we need to do the exact same procedure for the twin scan of the other side of the stone shells. Once completed it, the two batches need to be imported in the same file (or one of the two). Now we can register the two stones together.
Registration of the two halves
We have the two cleans batches containing one half of the same stone. What we are going to do now is registering the two stones together to obtain one single stone. To do so, we are going to use the command Cockroach_RegistrationRIManual (see video). First select the point cloud source and after the cloud target, click enter or backspace. The parameters are preset. Click enter untill the two stones are well alligned, when it’s fin click esc and the two halves will be registered. To know when the two halves are alligned have a look at the Rhino shell output. The bigger the fitness value, the better (more than 0.6). The smaller the RMSE value the better (less than 0.004).
💬 Troubleshooting: Sometimes the above method of registration (
Cockroach_RegistrationRIManual) won’t work, e.g., for very flat stones or very little ones. In this case, we need to do more extra work to register the two halves of the stone. First we are going to manually place the two halves as close to their possible reconstruction as possible. We are going to use the commandmoveand thegumballin the Rhino workspace. Once the two halves are roughly positioned we are going to use the commandCockroach_RegistrationICPPtPl. In the parameters, changeThresholdDistanceto 0.001.
The halves are correctly registered and well positioned. Now we just need to merge the two halves into one cloud per stone. To do so, welect the two halves by drag-selection or left-click, and type the command Cockroach_MergeCloud. The two shells are now merged into one point cloud ready to be stored.