Macros
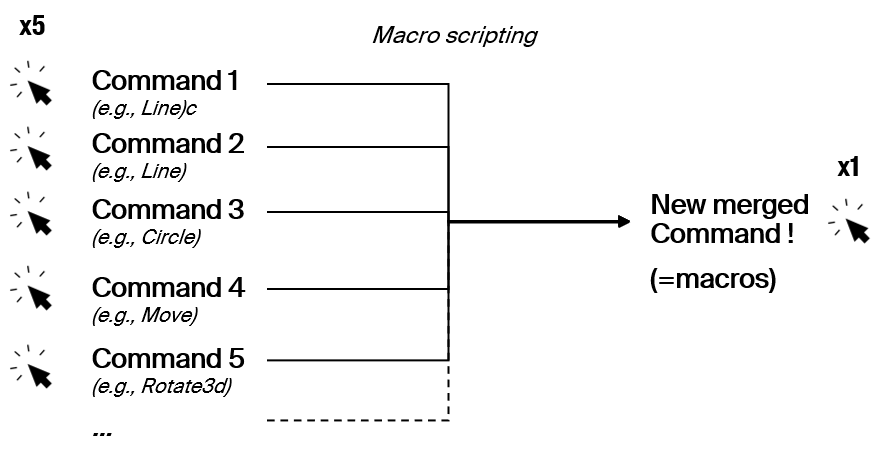
What if instead repeating few commands to achieve a specific result you could couple them in just one. That is what we call a macro in Rhino. Instead of clicking you will write down commands and stich them together in one operation. They are nothing else than a set of instructions to automatize some boring, repetitive tasks. Basically, you are going through the same process as if you were typing or clicking the options at the command line one at a time.
Are macros a form of scripting? The answer is no. Scripting is much more of a complex process than assembling macros. Nevertheless, editing macros share a common element with canonical programming languages: you are written something that the software(in this case Rhino) can understand.
MacroEditor
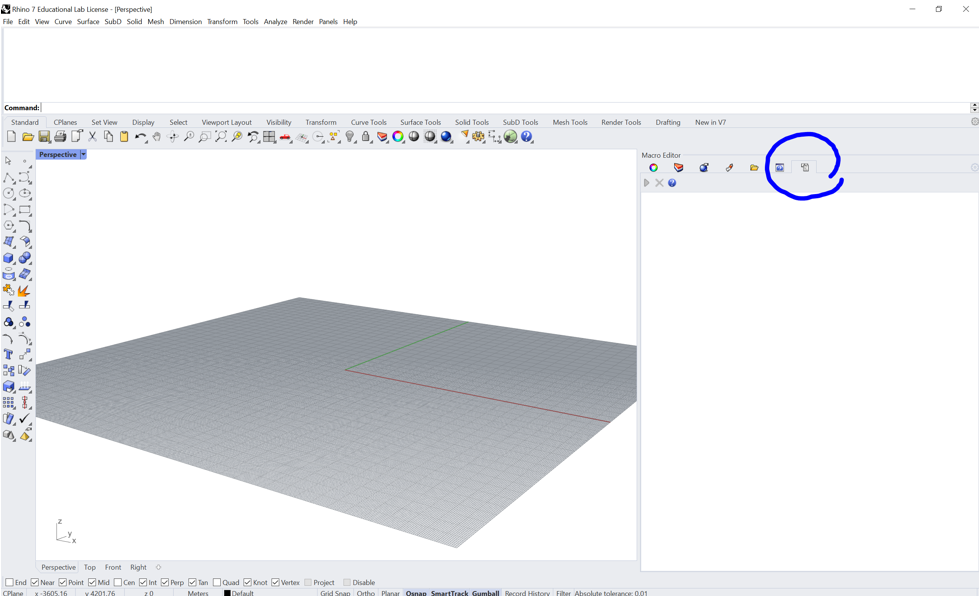
You can use the MacroEditor pannel for assembling your macro, the dedicated built-in interface for Rhino. The macro editor can be found in the property panel. If you don’t have it have a look at the settings icon (little grey gear) on the top right of the property panel.
If we look closely here’s what the MacroEditor looks like this:
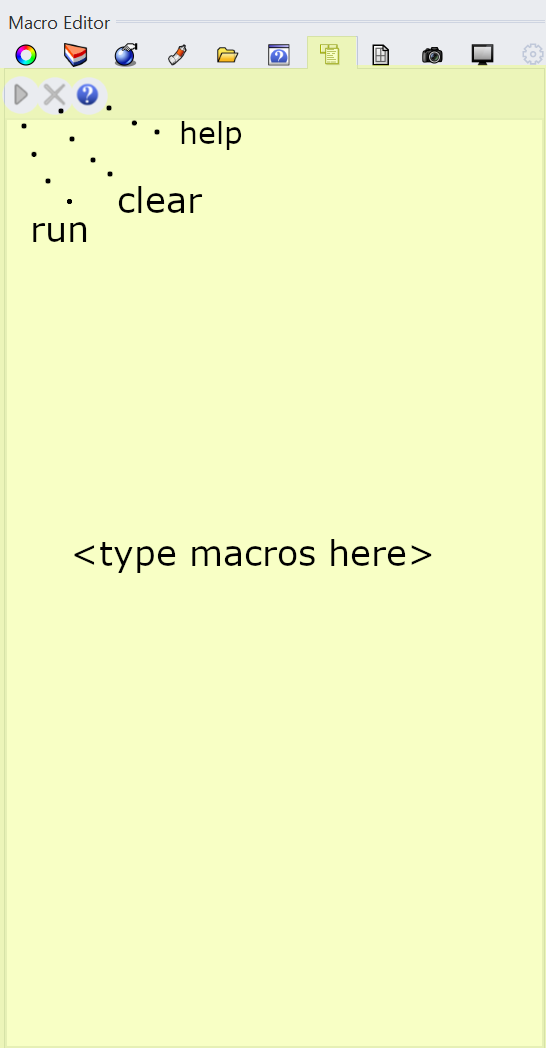
If you click on the ❓ symbol you will open the Rhino’s documentation on command macros and general scripting. If you have doubts always check documentation.
Macros’ synthax
Open the a Rhino file and open the Macro editor as shown. Let’s type the following macro to draw a cube of fixed test dimensions by clicking on a point. Enter the current macro in the editor and click the ⏵ button or by typing _MacroEditor in the command line.
! _Box _Center _Pause r5,5 _Enter
And here’s what each element of the block is responsible for:
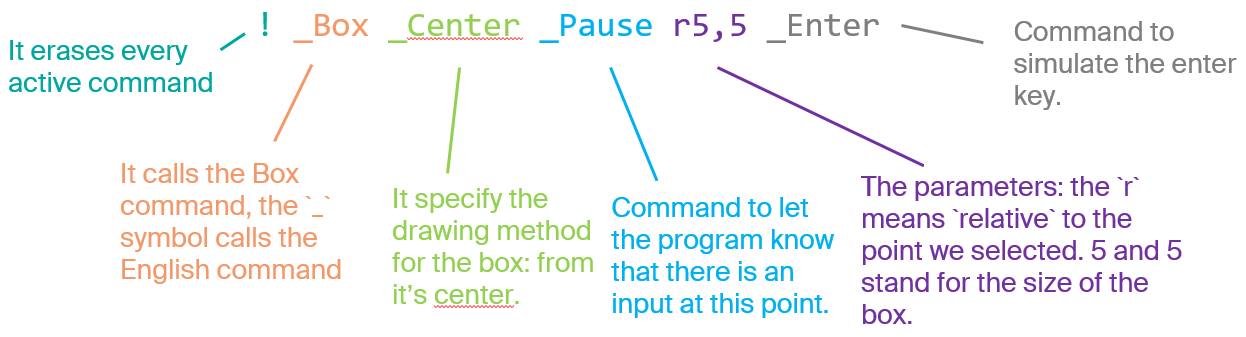
You will notice that all the commands (except the initial one and the parameters) are preceded by the symbol underscode _. In Rhino, this allows you to type in an English command even if your Rhino is in another language.
Usefull Rhino commands for macros
Now let’s have a look at some useful commands to for macro editing:
Select : Select a number of objects
SelLast : Select the last object added to the space
SelPrev : Select the last object
SelNone : Deselect
SetObjectName : Set object name
SetGroupName : Set group name
SelGroup : Select grouped objects
SelName : Select an object by name
Group : Group objects
Ungroup : UnGroup objects
And here’s a list of the symbols that you will encounter more frequently in macros’ synthax:
* : Causes the command to repeat automatically without pressing Enter to restart
! : Cancels the previous command
_ : Runs command as English command name
- : Suppress any dialog box
' : The apostrophe tells that next command is a nestable command. (geometry creations are never nestable)
/ : If the first character in a toolbar macro is not “!” and the last charcter is “/”, the script runs on the command line without “Enter”, so more information can be added.
~ : Suppresses command options for clutter free command feedback
; : To add comments in Rhino’s macro editor
Clean macro
The last one is particularly interesting. The symbol ; for macros in Rhino are used to document your code, leave notes and help others understand your code in case you think the macros themself would not be enough. Also the way your write your macros help you and the people you are working with to understand better wwhat you want to achieve. Let’s look at the following macro:
! _Box _Center
_Pause r5,5 _Enter _-Circle
5,5 10 _Polyline _Multipause
If you run this in your editor it will work, the machine has no problem in understanding this. But is it really readable and understandable by fellow humans? Or even yourself if you imagine to leave this on the side and then later on jumping back on it, would you be able to orient quickly yourself in it?
To make this small set of instructions cleaner we can do the following:
!
; Create a box
_Box _Center _Pause r5,5 _Enter

; Draw a circle
_-Circle 5,5 10

; Draw polylines
_Polyline _Multipause
Much cleaner this way. The way you write and organize the code in your editor has an impact on readability and comments can help to document your work for you and others. With practice your code will do not need many comments to be easly understandable.
Containerization of macros
If you think you are going to reuse the macro you can embed it in a custom command that you will name. This command will appear as a button in the main UI as every other command. To do so go click right on the top tool bar and select `New Button…” from the menu. A pop-up window as this one will appear:
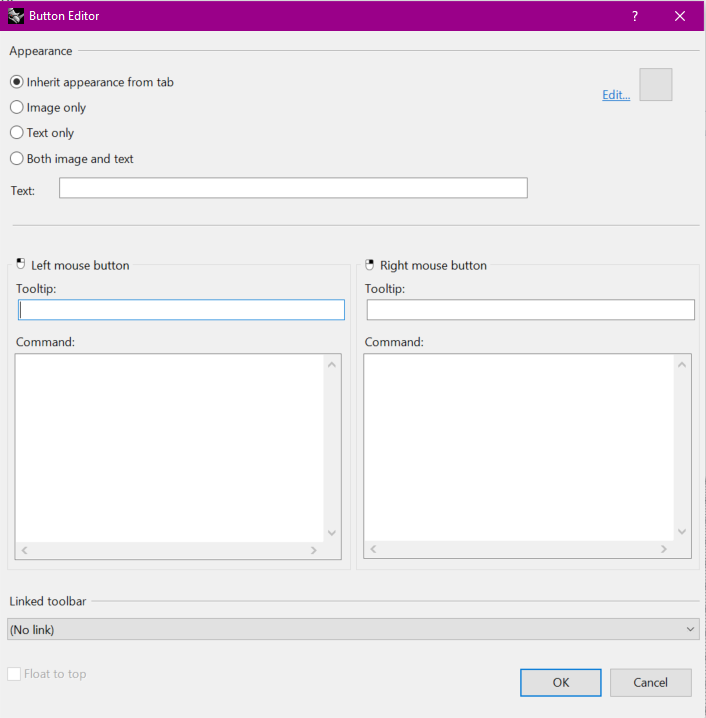
This way you will be able to reuse more than once your macro.
Hardcoded data
This scripting of options for a single command can also be combined with data entry (i.e. coordinates or other numerical data). By harcoded data we intend all that data that is defined by the user. A list of points for the interpolation of curve is an example of that.
! _interpcrv
23,5,0
23.2,5,0
23.7,5.2,1
_Enter
_interpcrv
23.7,5.2,1
26.8,4.9,1.0
27.1,4.8,0.9
_Enter
...
This might represent very well the limit of macros. Writing very long list of picked values contradicts the goal of macros: saving time. The harcoded values cannot change during the execution of the macros. But what if we would like to add +1 to those coordinates every second? Would macros be able to loop through the commands and change their parameters?
Extra references
- WikiMcneel: https://wiki.mcneel.com/rhino/basicmacros