Introduction to Grasshopper
Visual scripting
When we first hear about coding, we usually imagine someone typing a text in an obscure language with symbols and formulas that only few people can decipher. Coding languages may indeed have complex syntaxes, grammar rules, and specific vocabulary which can be daunting at first glance. Fortunately, visual programming languages have been invented to make scripting more accessible to beginners through intuitive graphical interfaces where no typing is required!
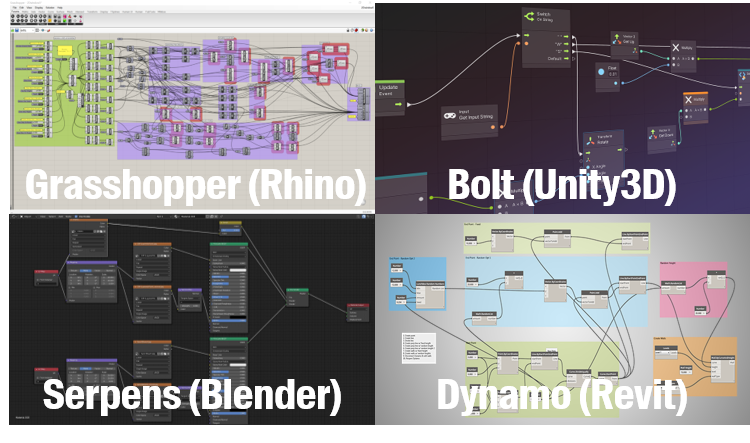
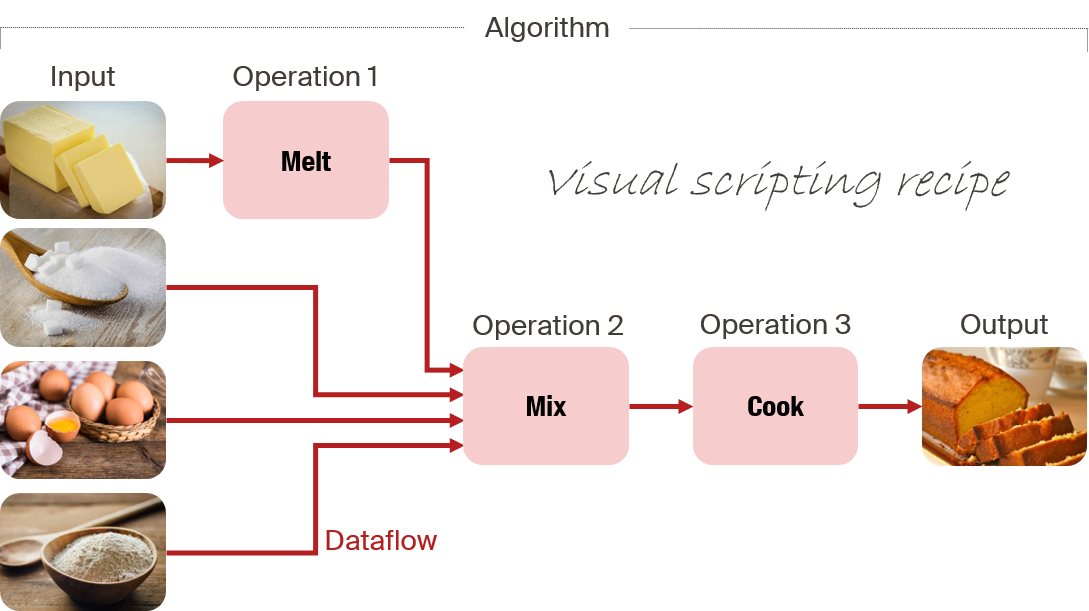
Many 3D modeling software have their own visual scripting language but they are all based on the same “boxes and arrows” principle where the boxes represent the different steps of the algorithm and the arrows represent the dataflow. You can think of an algorithm as a recipe where the initial ingredients are the input, the result is the output, and the data flow is the order is which the different operations are executed.
Visual programming languages usually rely on a linear logic. Data can only flow forward. This means that it is not possible to connect an arrow towards a previously executed box. This prevents temporal paradoxes! However, this also brings some limitations, such as precluding the use of iterative loops. Although some plugins provide a workaround, regular text-based scripting will be preferred on these occasions.
When coding with a visual programming language, things can become quickly messy! Therefore, it is important to be very organized! Avoid crossing arrows, position the boxes in their order of execution according to the dataflow, and document your code by adding written explanations for the key steps of the algorithm. This will help you keep your code clean and avoid getting lost in a “spaghetti code” such as the one below!

Grasshopper interface
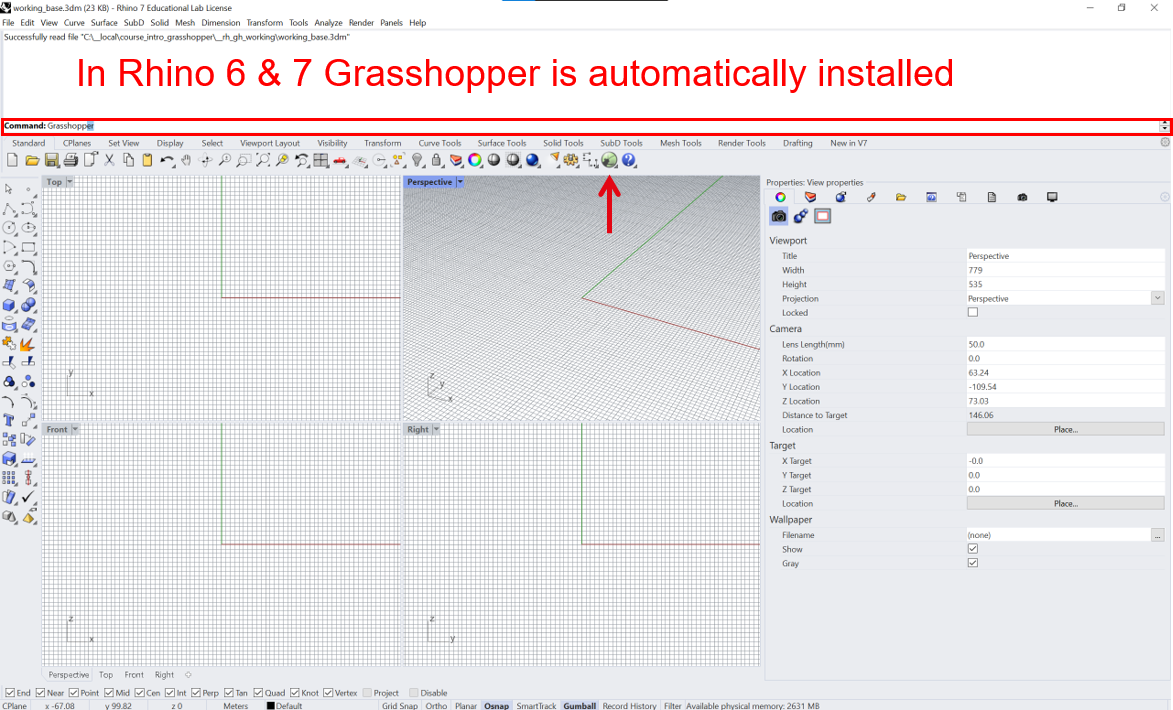
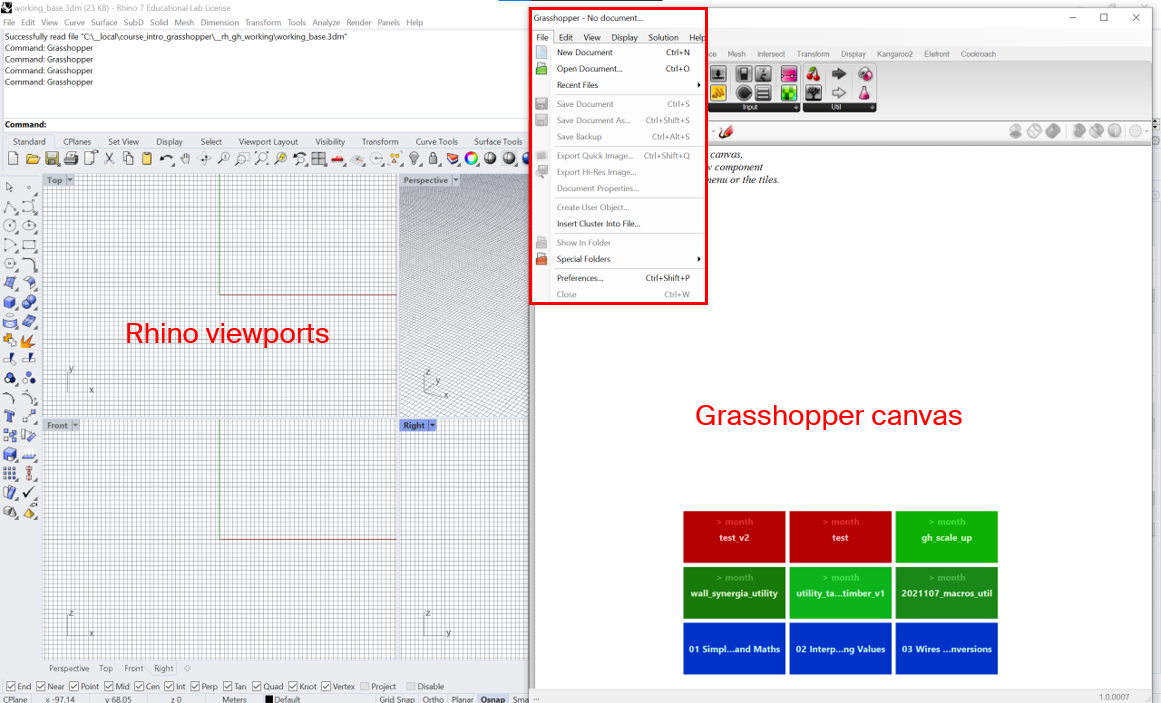
In Rhino 6 and 7, Grasshopper is automatically installed. Simply type “Grasshopper” in the command bar or click on the green icon in the standard tab. This opens a new blank document on the grasshopper canvas.
Like for many software, the File tab allows to create, open, and save documents (shortcuts: Cmd/Ctrl+N, Cmd/Ctrl+O, Cmd/Ctrl+S).
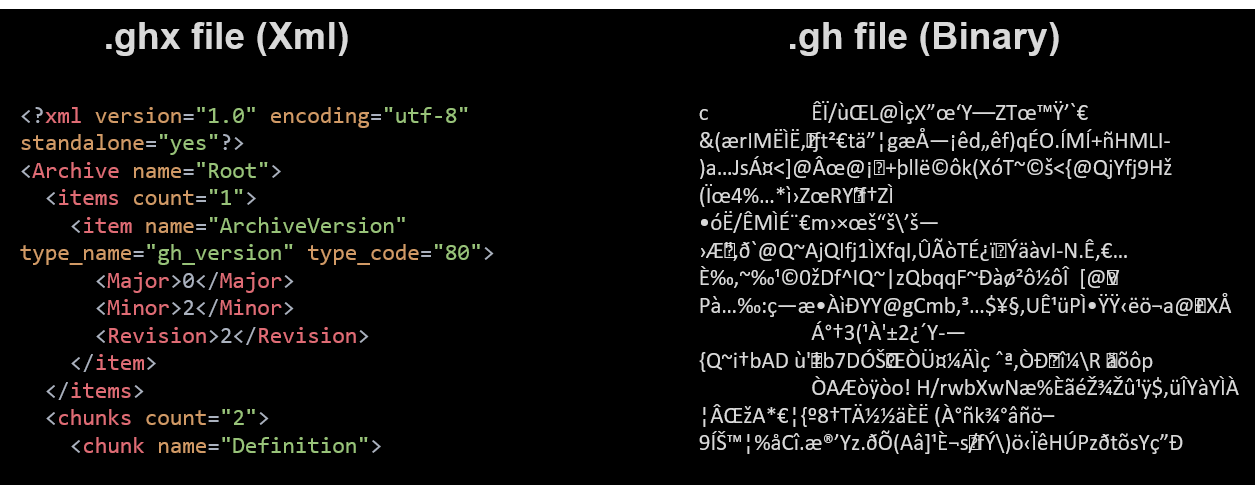
Note that grasshopper files can be saved in two different formats:
- .gh saves the data in a binary format which is unreadable by human eyes but optimized to reduce file size. You are almost better off using this format.
- .ghx saves the data in XML format which is a structured human-readable syntax that can be decoded without using Grasshopper. As a trade-off, file size can be 10 to 100 times bigger.
Let’s now have a look at the Grasshopper interface. In Grasshopper, each operation is stored in an individual component which is represented by a custom icon. Per default, the available components are regrouped in ten different categories. However, there is a large variety of plugins that can be downloaded to add new categories and components. Each category is divided into sub-categories. To see the full list of components of a sub-category, you need to click on the black bar with the sub-category name. To add a component on the canvas, click on the component icon and drag it to the canvas. Alternatively, you can double-clik on the canvas and type the name of the component you are looking for.

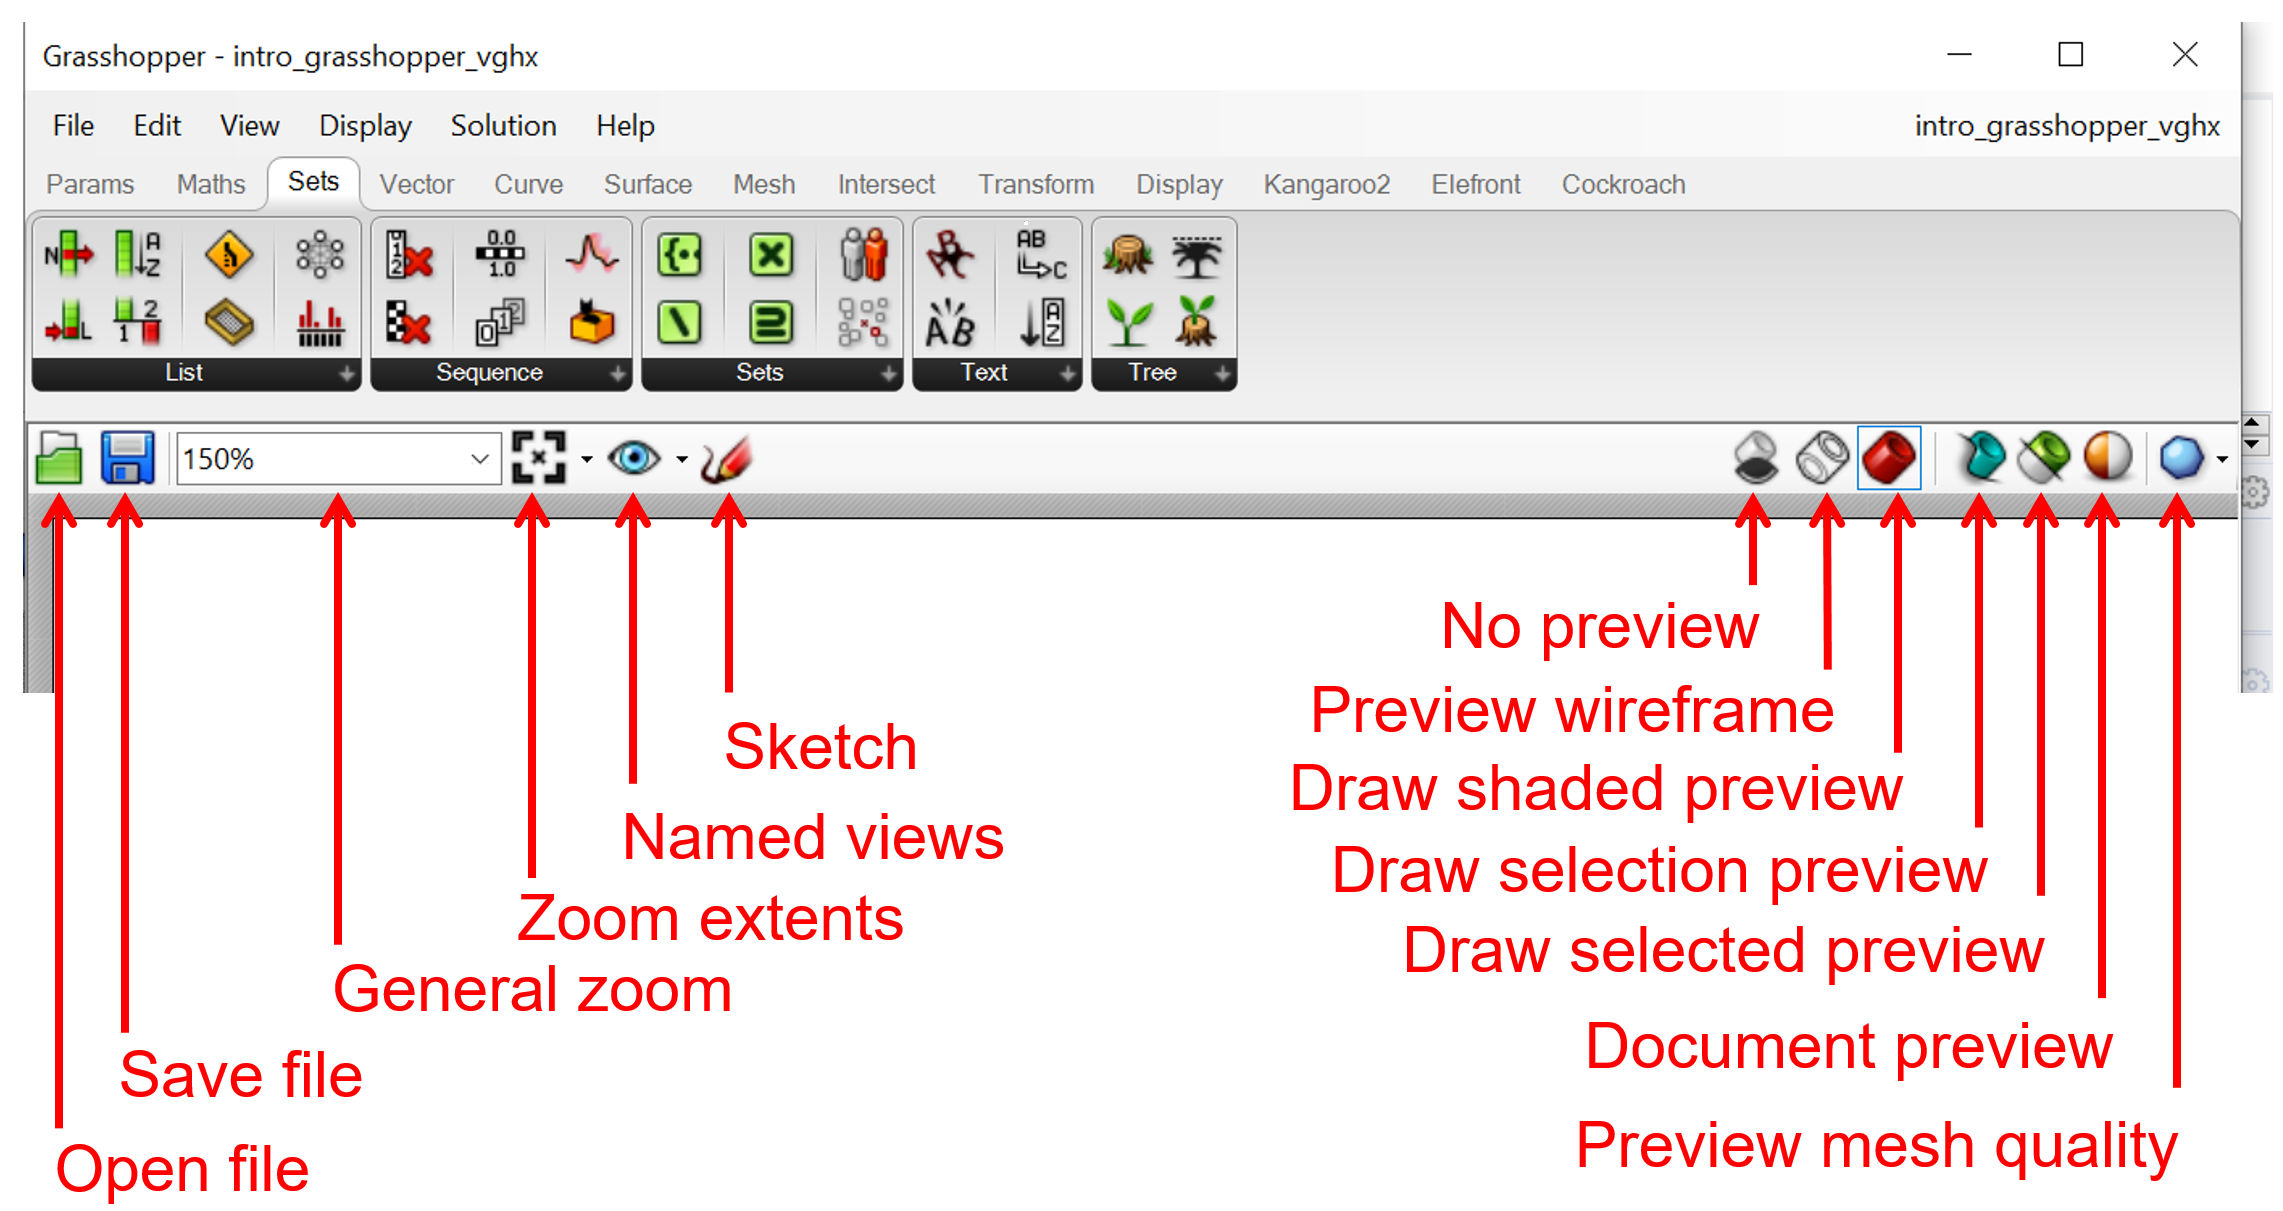
You will see that Grasshopper often provides you with several ways of performing the same task. For example, you can also open and save files from the toolbar by clicking on the corresponding icons. This is also where you will find options to zoom or sketch on the canvas. In addition, the icons on the right of the toolbar allows the modification of the display settings.
Components states
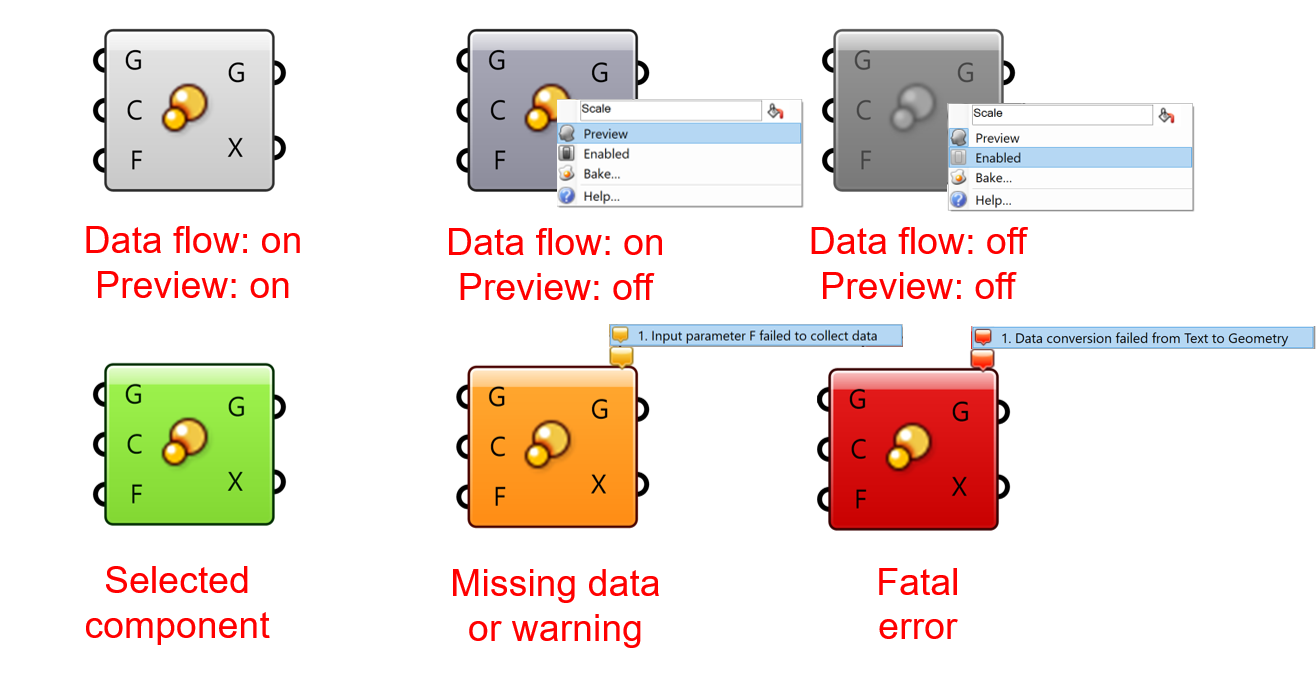
Components on the canvas can take different colors depending on their status. Here is a summary:
- Light grey: Default state of a grasshopper component, the geometry output is displayed in red (per default) in the Rhino viewport.
- Grey: The preview is hidden but the component is still running and returning an output.
- Dark grey: The component is disabled. This is particularly useful to prevent running time-consuming operations every time the algorithm is modified.
- Green: The component is selected and the geometry output is now displayed in green (per default) in the Rhino viewport.
- Orange: Warning that some input data is missing or that there is a small error which does not prevent the component from running but may lead to an undesired result.
- Red: Fatal error preventing the component from executing the operation. More information on the error can be found by hovering the small bubble above the component.