Rhino - Viewport
Here we will get familiar with navigating viewports. What you see in a viewport of any 3D modelling software is the result of a virtual camera, rendering 3D geometries in the virtual space. In the View properties panel you can adjust settings of the camera to modify the way geometries are rendered (e.g. lens length, camera location, etc).

Enough theory, let’s get down to see how to navigate on Rhino.
Viewport selection
Pan
Rotate View
Zoom scroll
Zoom selection
Viewport navigation extras
We cover the very basics of viewport navigations and camera properties but there are other useful commands and tools if you want to explore the Rhino navigation deeper. These are the 3 Tabs that collects them.
- Set view Tab: It contains basic commands and tools as well as animation commands.

- Set view Tab: To change the render mode of the viewport. There are multiple render modes in Rhino: Wireframe, Shaded, Ghosted, etc’… each one is useful in particular situations: inspections, presentaiton, drawing, etc’… Here there are also other very useful commands like
_ClippingPlane, which allows to crop geometries in the view.

- Set view Tab: In this Tab you can find tools to better orgranize the layout of the viewports.

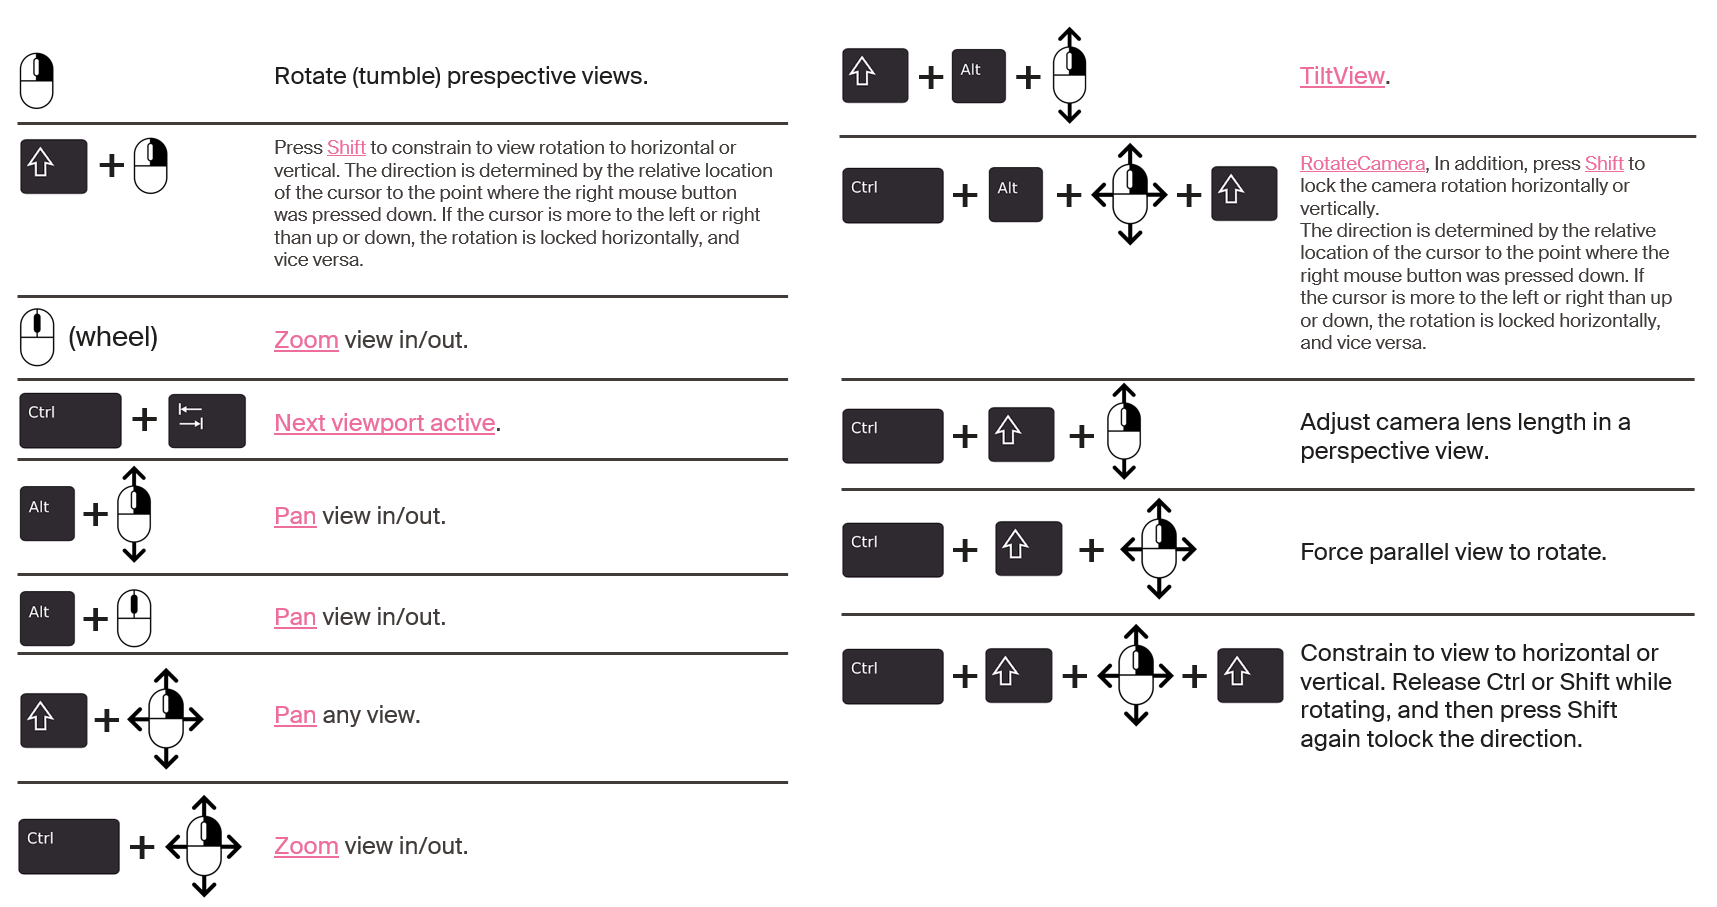
🍬🍬🍬 Just some bonus navigation shortcuts (on Windows) that might come up handy 🍬🍬🍬
Navigation keyboard shortcuts
Some practice
Click on the link below and download the exercice. Move the Rhino cameras untill you can see all the 5 images. Once you found it, make a screen capture for each image and save it on your local machine.
⚠ To find the last image you might need to create a new viewport in Isometric mode. ⚠
🦏⬇️⬇️⬇️ Download the rhino_start ⬇️⬇️⬇️🦏
Check out How we solved it..
.. to find the image and make a screenshot,
.. and to create a new viewport.