Welcome to AR-327 !!
Teaching team:
Damien Gilliard
PhD Student
PhD Student

Amir Ammar
Teaching Assistant
Teaching Assistant

Amine Bengelloun
Teaching Assistant
Teaching Assistant
Prof. Yves Weinand
Head of IBois
Head of IBois
We are a collaborative team from the IBois lab, specializing in computational design and digital fabrication with wood.
Your turn:
Please tell us:
- Your name
- Why you are taking this course (what do you expect to learn)
- Your experience with programming (if any)
Course objectives:
- Give you some starting tools to apply computational tools to your own projects
- Develop a computational mindset
- Introduction to coding and the benefits of computer science in design practice
Why Rhino ?
There is a lot of CAD software out there...
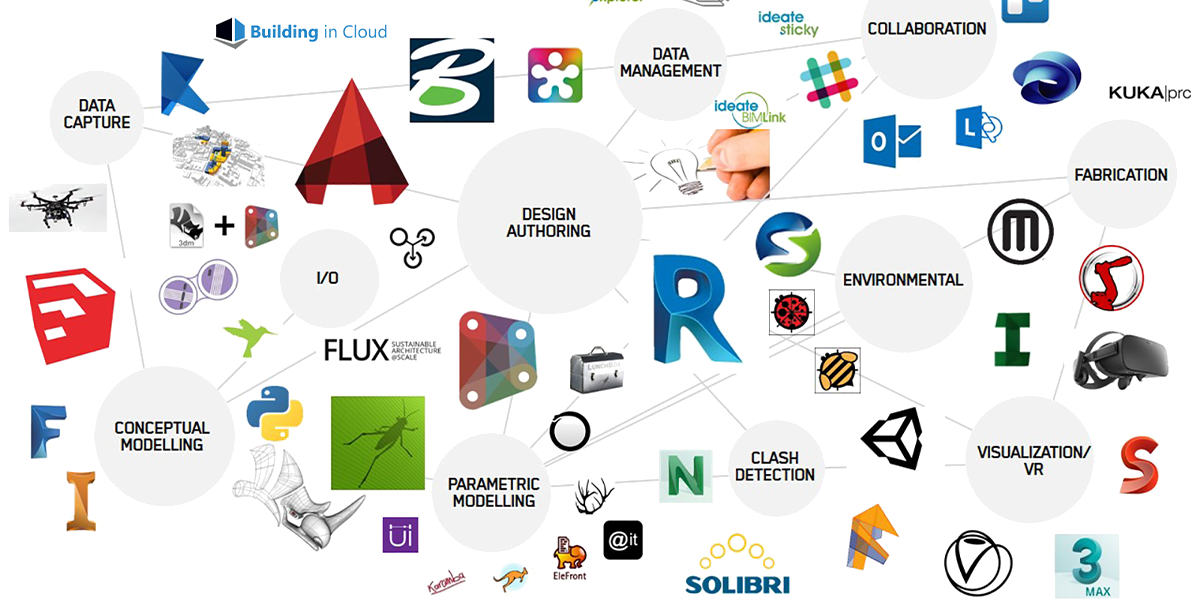
Rhino has good (visual) scripting capabilities
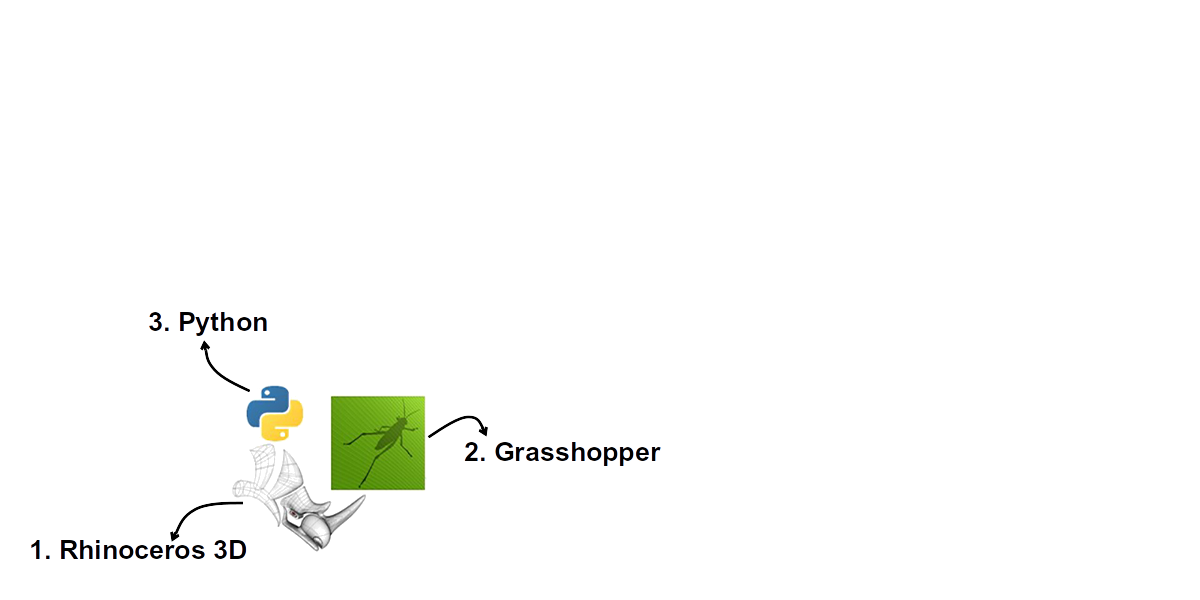
We will concentrate on Rhino + Python
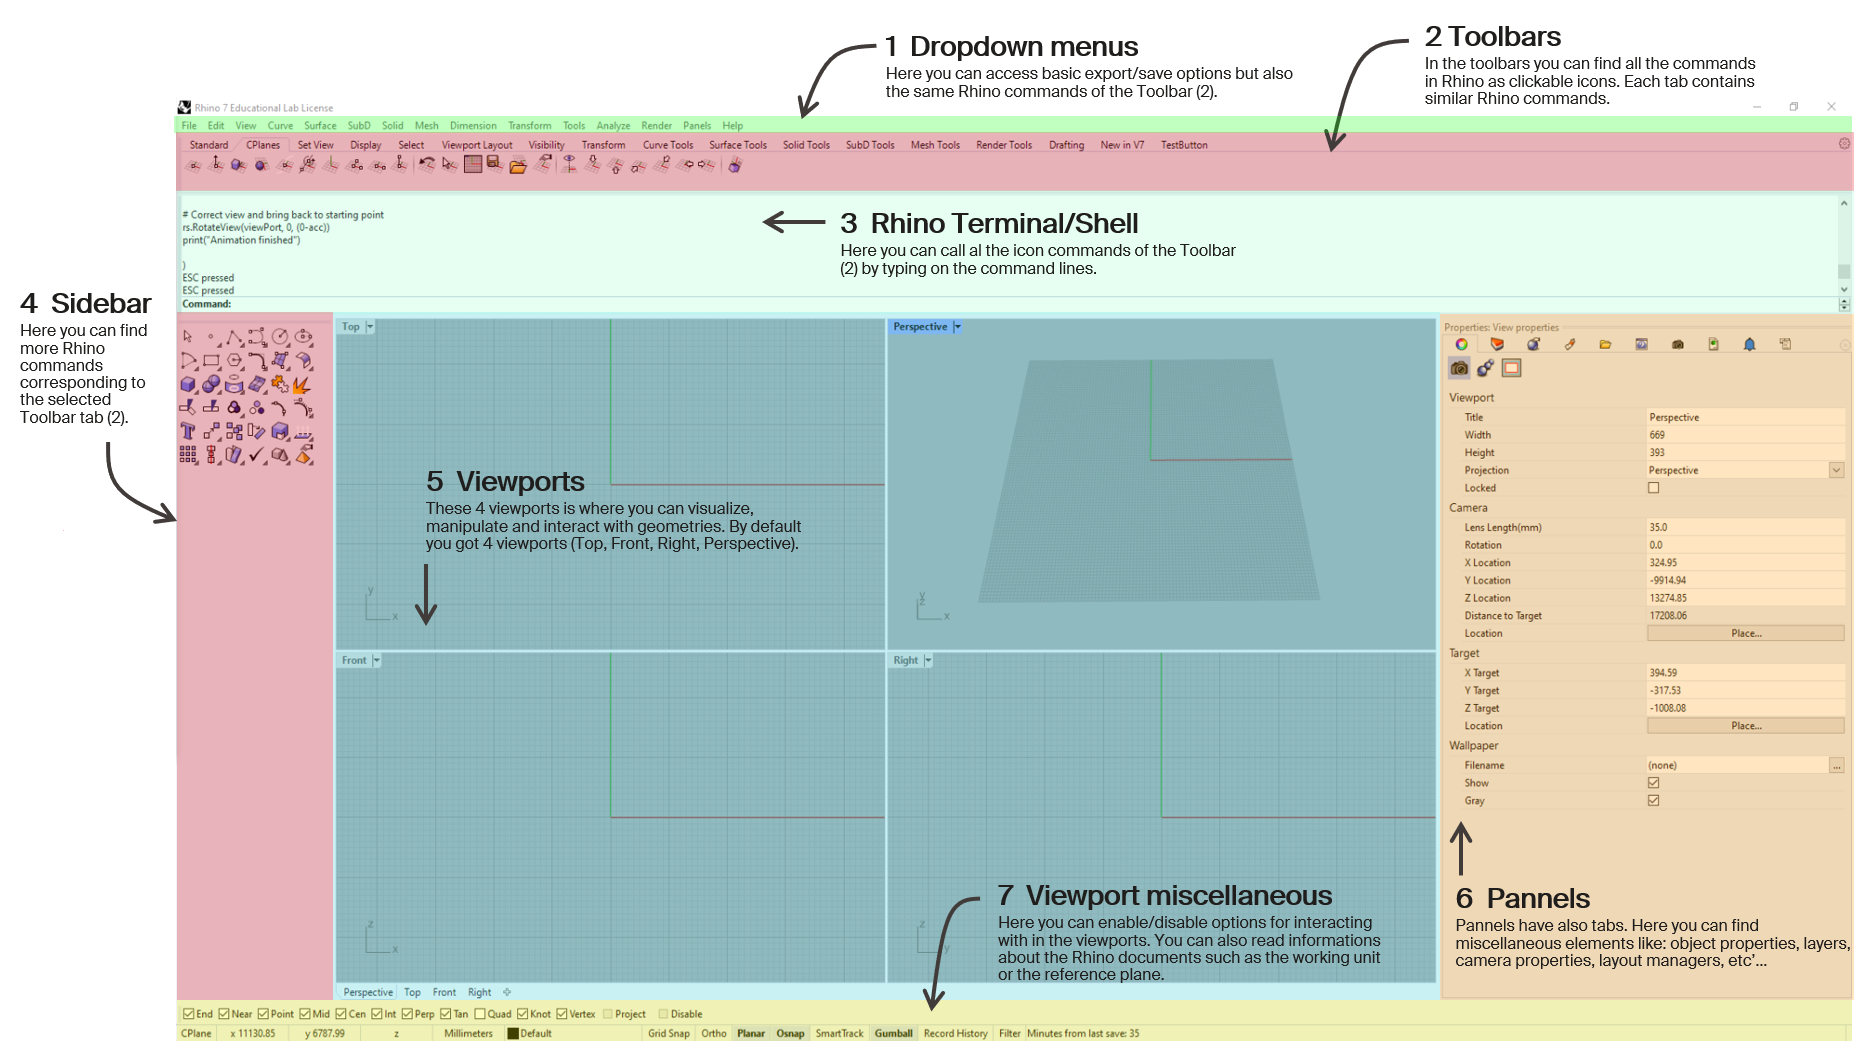
Rhino Interface
Rhino interface overview
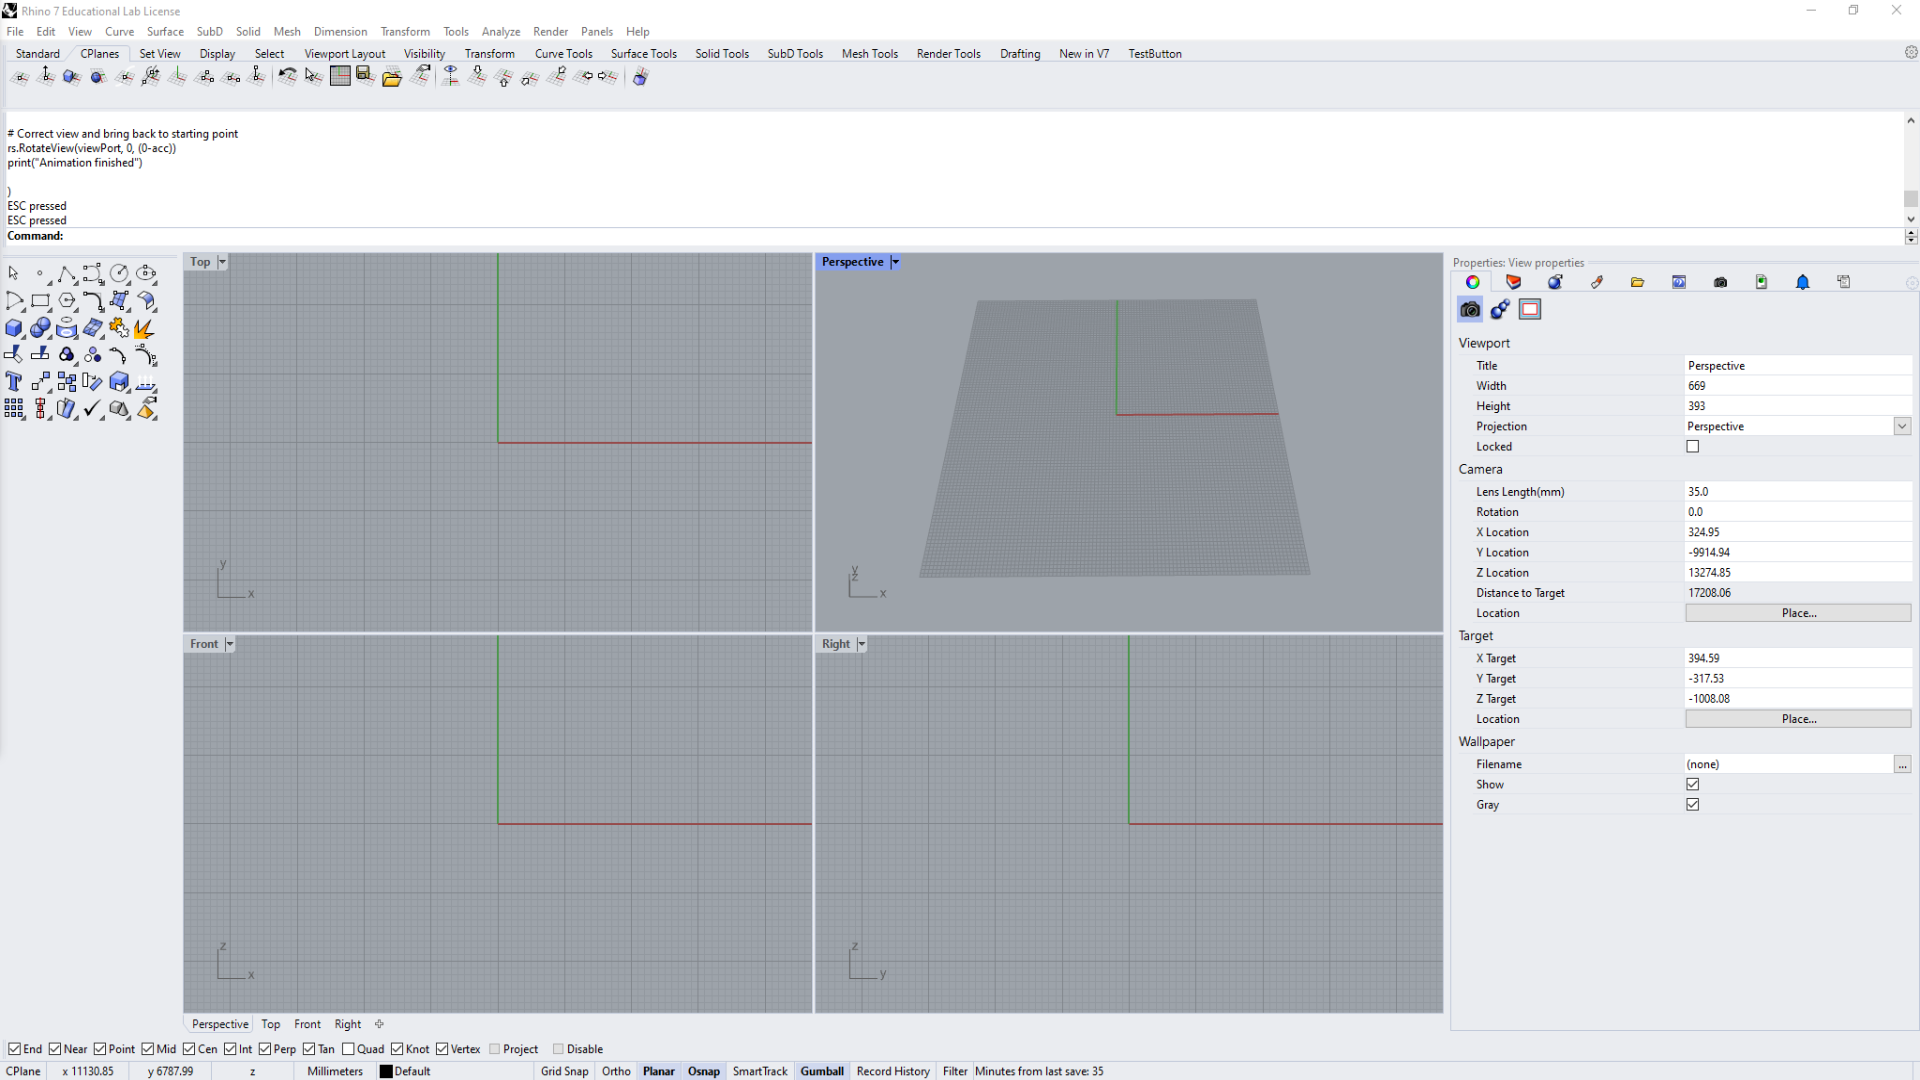
Rhino interface overview
🔨 Rapid exercice (1 min)
- Open Rhino
- Draw a line using the toolbar
- Draw a line using the terminal
🔨 Rapid exercice (3 min)
Now that we know the 2 methods to add geometry objects to the Rhino workspace, try to add a line with the following characteristics:- start point = {0, 0, 0}
- end point = {3, -4.6, 5}
What is the fastest of the previous methods to achieve this result?
Rhino basics
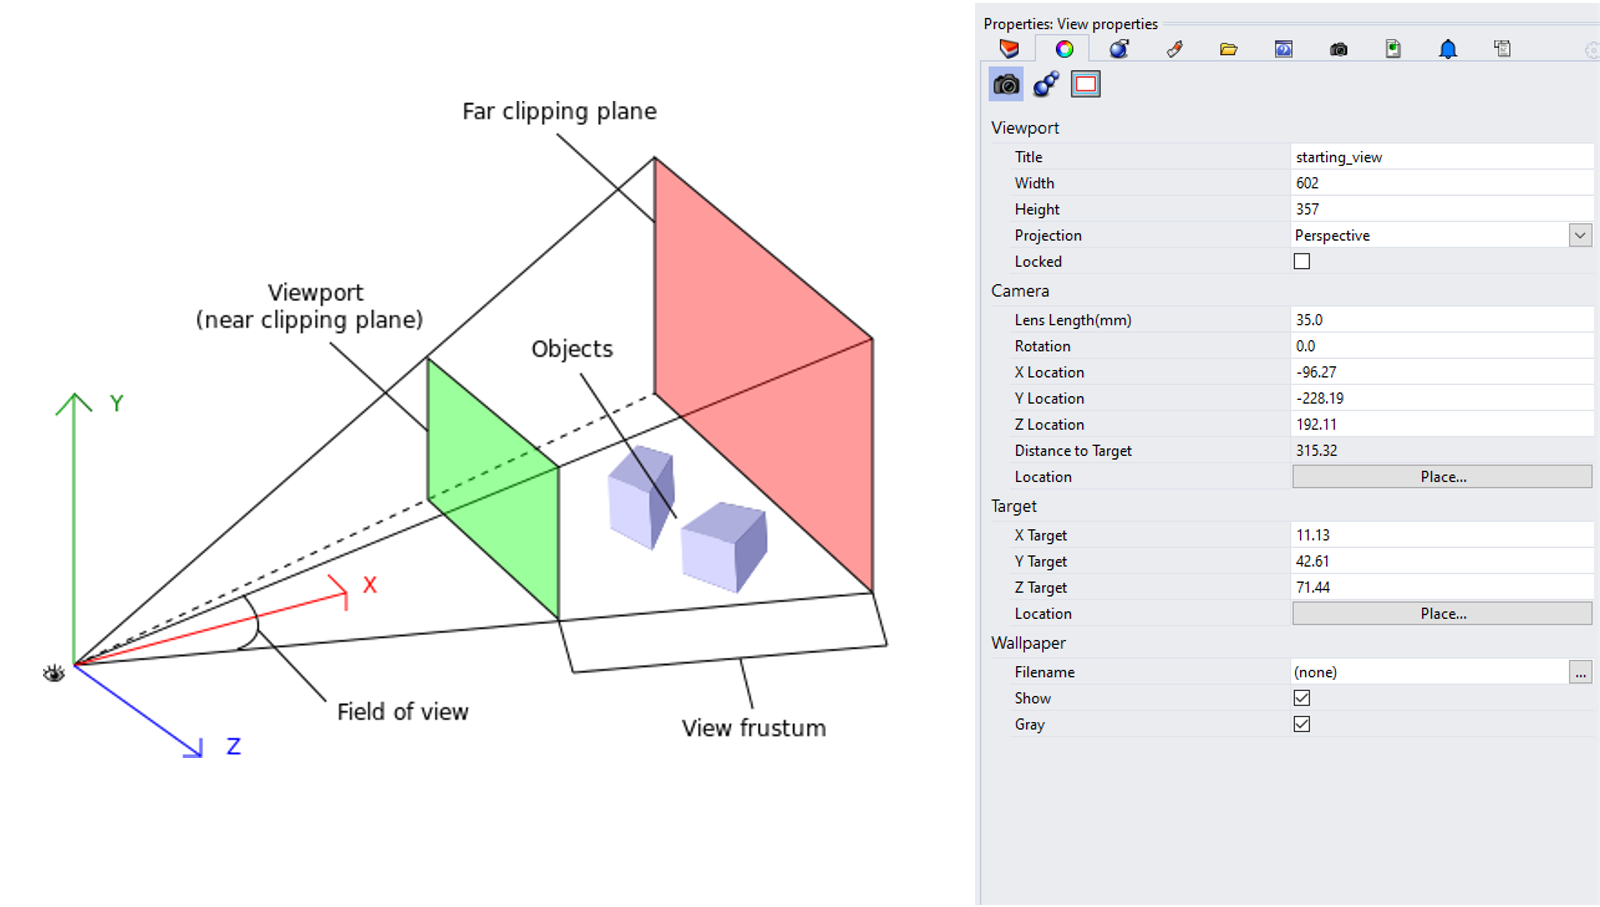
Rhino interface: viewport basics
Rhino interface: viewport basics: viewportselection
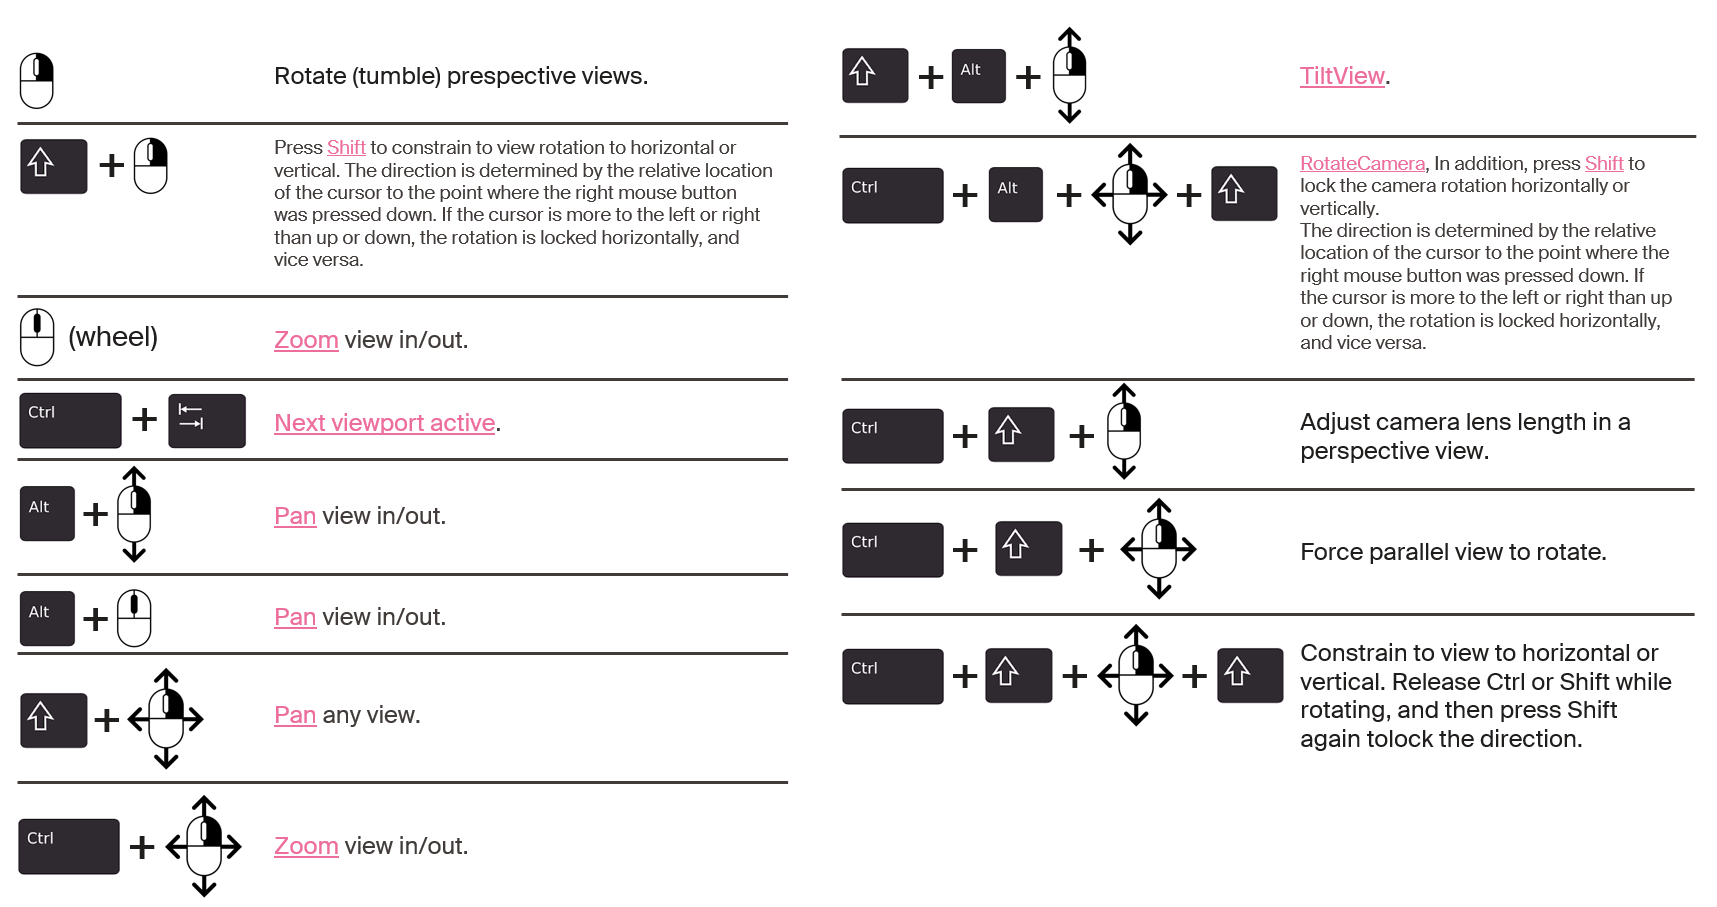
Rhino interface: viewport basics: panning
Rhino interface: viewport basics: rotate
Rhino interface: viewport basics: zoom and scroll
Rhino interface: viewport basics: zoom to selection
Rhino interface: viewport basics: small extras
"Set view" tab: basic commands and animations
"Display" tab: change render mode and utilities

"Viewport layout" tab: change viewport arrangement

Rhino interface: cheatsheet
Rhino interface: Transformation - move
Rhino interface: Transformation - rotate
Rhino interface: Transformation - scale
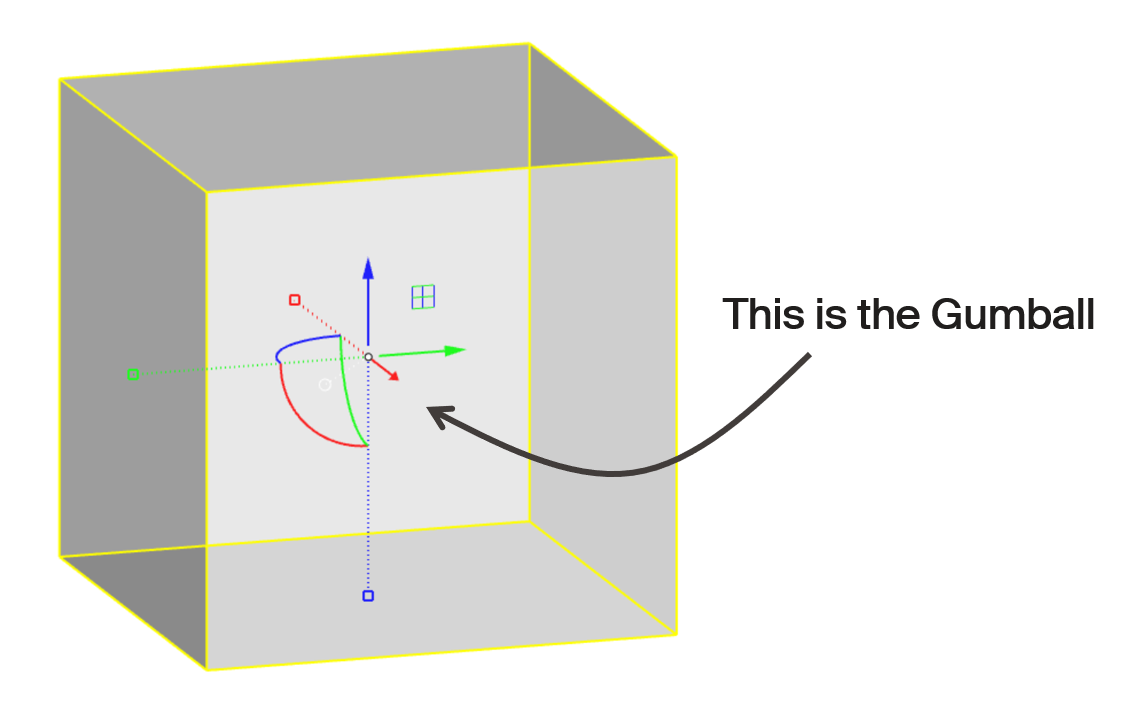
Rhino interface: Transformation - gumball
The gumball is a handy GUI tool for manipulating objects in Rhino.With it you can easily move, rotate, and scale objects in the 3 directions.
Rhino interface: Transformation - gumball translations

Move X : click & drag
Move Y : click & drag
Move Z : click & drag
free move : ctrl + click & drag
Planar move : click & drag
Move by value : click + ⌨️
Rhino interface: Transformation - gumball rotations
Rotate X : click & drag
Rotate Y : click & drag
Rotate Z : click & drag
Rotate by value: click + ⌨️
Rhino interface: Transformation - gumball scale
Scale X : click & drag

Scale Y : click & drag
Scale Z : click & drag
Scale uniform: shift + click & drag
Rhino interface: - gumball position
Change gumball position : option tab at the bottom of UI
Auto-reset gumball : option tab at the bottom of UI
🔨 Rhino exercice (27 min)
Try to use what we just learned about geometry manipulations in Rhino. Open the file 20210907_rh_transformation_start and recreate the geometry of the IBOIS Mendrisio timber pavillon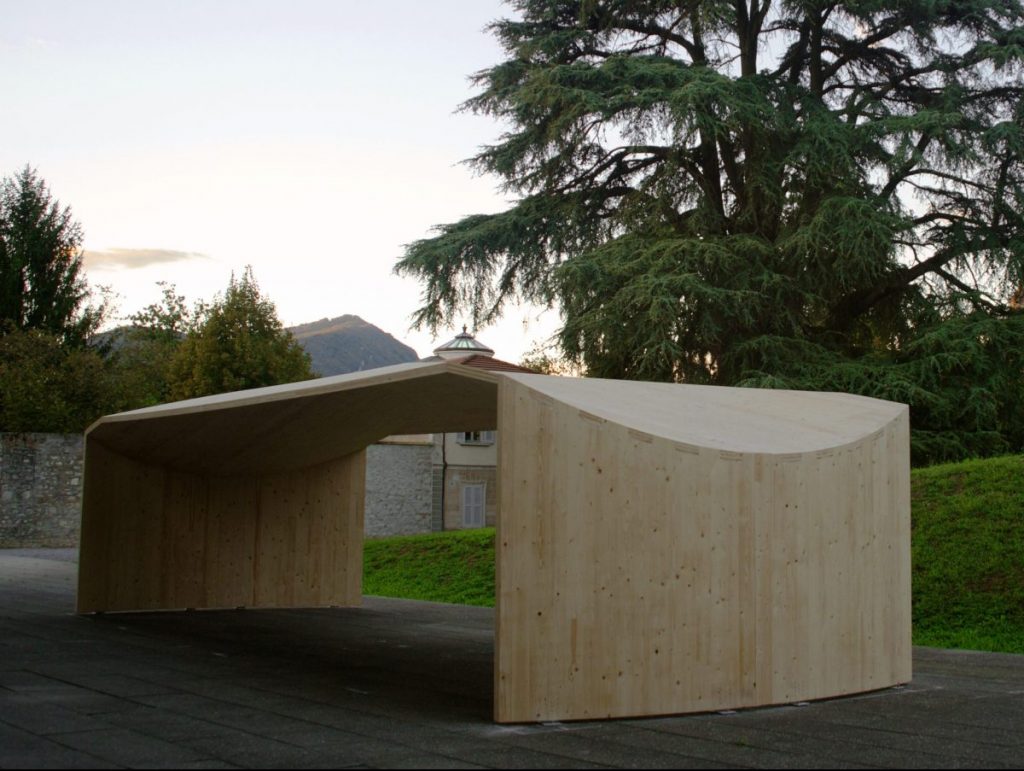
Macros
What are macros?
Macros are the first stepping stone towards coding in Rhino (and going down the rabbit hole). They are made to automate simple, repetitive tasks within Rhino. And it’s the simplest level of scripting that you can find. They simply combine Rhino Commands together in one call.
Learn more about macros
What are macros?
They simply combine Rhino Commands together in one call.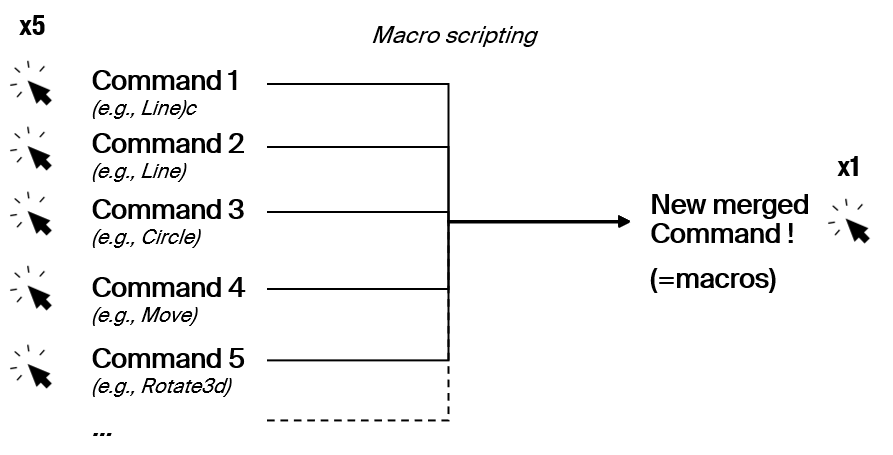
Where to script macros ?
The macro editor can be found in the property panel. If you don’t have it have a look at the settings icon (little grey gear) on the top right of the property panel.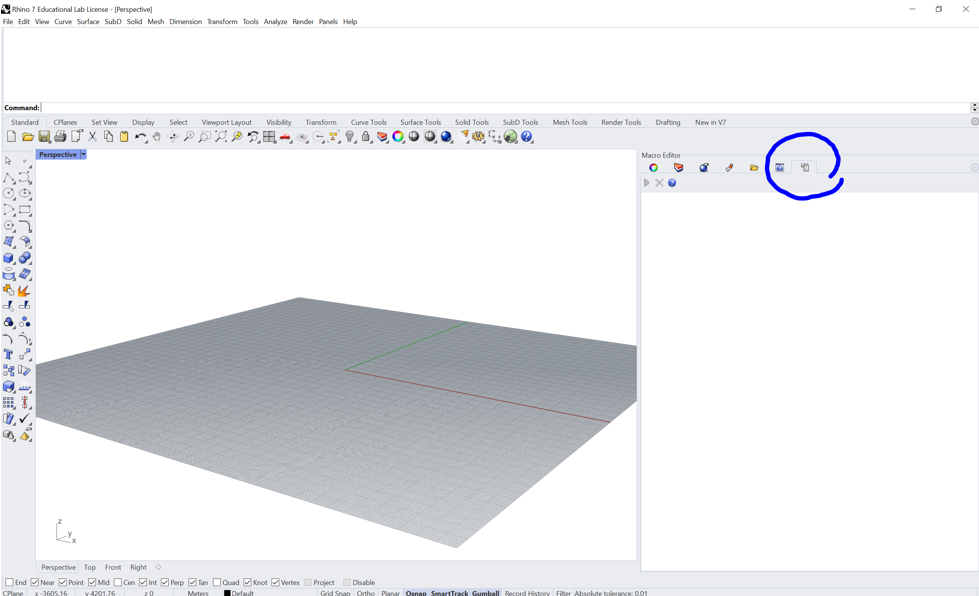
Let's see an example of a basic macro:
Can you explain which element does what in the script ?
! _Box _Center _Pause r5,5 _Enter
Let's see an example of a basic macro:
Can you explain which element does what in the script ?
			! _Box _Center _Pause r5,5 _Enter
			/* Explanation of the commands:

			!  		  : it erases all previous command
			_Box    : it calls the Box command ("_" for the English command)
			_Center : Specifies the drawing method for the box (from its center)
			_Pause  : We need to wait for user input
			r5,5    : r means relative, 5,5 is the distance from the user-defined center
			_Enter  : Command to simulate the Enter key

			*/
Useful commands in macros:
Can you understand what each of the following commands does?
			_Select
			_SelLast
			_SelPrev
			_SelNone
			_SetObjectName
			_SetGroupName
			_SelGroup
			_SelName
			_Group
			_Ungroup
Useful commands in macros:
Can you understand what each of the following commands does?
			_Select			      # Select a number of objects
			_SelLast			    # Select the last object added to the space
			_SelPrev		     	# Select the last object
			_SelNone			    # Deselect
			_SetObjectName		# Set object name
			_SetGroupName	  	# Set group name
			_SelGroup	 	    	# Select grouped objects
			_SelName			    # Select an object by name
			_Group			    	# Group objects
			_Ungroup	       	# Ungroup objects
Useful symbols in macros:
			* # Causes the command to repeat automatically without pressing Enter to restart
			! # Cancels the previous command
			_ # Runs command as English command name
			- # Suppress any dialog box
			' # The apostrophe tells that next command is a nestable command. (geometry creations are never nestable)
			/ # If the first character in a toolbar macro is not "!" and the last charcter is "/", the script runs on the command line without "Enter", so more information can be added.
			~ # Suppresses command options for clutter free command feedback
			; # To comment a macro
documentation
Rhino's documentation on Macros
🔨 Macro exercice (15 min)
Make a macro that in 1 click does:
* add one blue, red, and green box with dimensions {1, 1, 1}
* align the boxes along the (1, 1, 1) axis, each separated by 0.5 unit
* align the boxes along the (1, 1, 1) axis, each separated by 0.5 unit
5% Assignment: Automatize lap joint creation with macros

- 100% of the grade: You are tasked with making a lap joint in two pieces of timber. The shorter the macro, the better.